Paint A Portrait Of Someone You Love With A Glowing Dreamy Background
...even if you've never painted before.
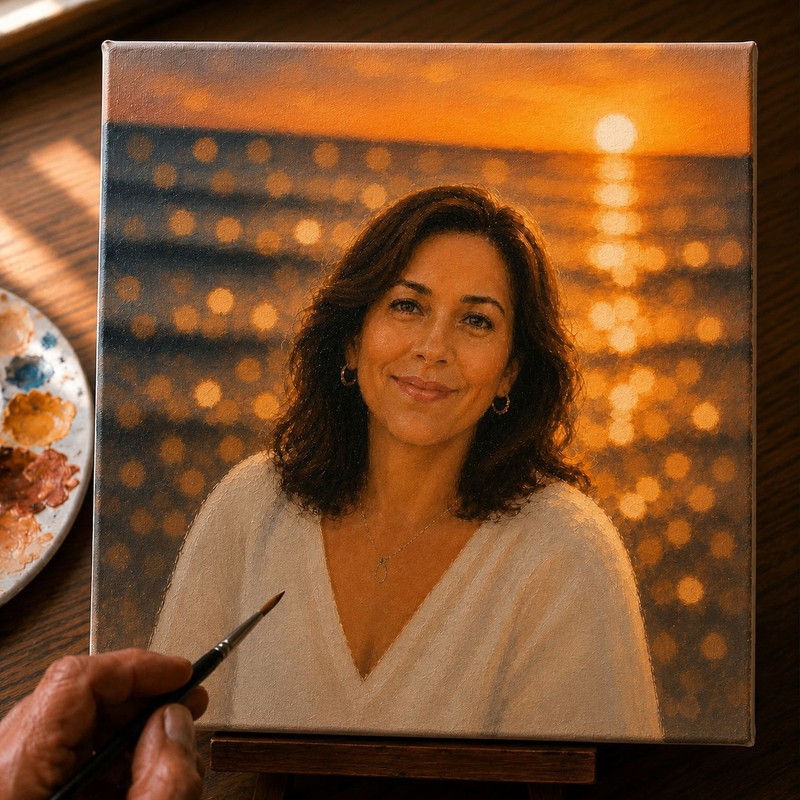
Imagine...
- →Surprising someone you love with a framed canvas you painted of them from their favorite photo, the golden bokeh glowing softly behind their face, and watching them realize it's not a print. It's your hand that made it, and now it's theirs forever.
- →Finishing a painted portrait of someone you care deeply about, with soft dabs of light scattered behind them, and feeling that quiet rush of "I actually made this" for the first time in years, maybe ever.
- →Your family group chat lighting up with "wait, YOU painted this?!" the second you post the canvas you finished last night, right before everyone starts asking who's next.

Have you ever seen something like this and thought...
So you sit down with a brush, a tube of paint, and a photo you love, and it's not as easy as it looks. The eyes are close, but somehow not right. The proportions keep shifting the whole face out of balance. And the background? You have no idea where to even begin with all that glowing, blurry light.
So you do what everyone does: you turn to YouTube. You find a tutorial on "how to paint realistic eyes," another on "how to paint hair," another on "how to blend skin tones." Each one teaches a technique in isolation, floating in its own little demo, disconnected from the actual process of building a real, finished portrait on canvas.
You try for a few weeks. You get a little better at mixing colors, a little better at blending. But you still can't sit down with a photo of someone you love and walk out the other side with something that looks like them, glowing softly on the canvas the way it does in your head.
"Maybe I just don't have the talent for this."
- It's not that you lack talent.
- It's not that you need more practice hours.
- It's that you've been collecting isolated tricks instead of learning the actual order of operations that takes a blank canvas to a finished, glowing portrait.
Here's the truth: professional portrait painters aren't relying on raw talent every time they sit down. They're following a specific sequence: block in proportions with thin paint first, establish light and form before detail, save the glow for last so it has something real to sit behind. Skip that order and no amount of eye tutorials will save you.
"All you need is a brush, some paint, a canvas, and a photo of someone you love. And here I am. I'll show you step by step."
Now, before I tell you more...
I Should Probably Introduce Myself
Hi, I'm Judy!
I'm the one behind this, and I promise, I didn't start out as some kind of painting prodigy.
Honestly, I used to look at portraits like this and think, "There's no way I could paint that."
But over time, I started experimenting. Just mixing colors, layering brushstrokes, and practicing for fun. And what I discovered was: you don't need to be an artist to create something this beautiful.
That's exactly why I put this together. To give beginners a way to paint something that looks stunning, but feels simple and satisfying to make.
If you've ever wanted to paint someone you love with your own hands, you're in exactly the right place.
The Dreamy Portrait Academy
Paint a portrait of someone you love, finished with the soft, glowing background that makes hobby art look gallery-worthy.

Here's a small taste of what's inside:
Brush Basics. Learn To Control Light And Dark Before You Touch A Face

You'll practice loading your brush and blending paint smoothly from light to dark, before you paint a single feature. This module gets your hand comfortable with the brush and paint you'll use in every portrait.
- Paint a simple strip that fades smoothly from light to dark, the one skill every realistic shadow depends on
- How to load your brush so the paint flows on smoothly instead of dragging or streaking
- Discover why most beginners paint everything too pale, and the easy fix
- A short warm-up you'll repeat before every new portrait to loosen up your hand
- Learn the difference between drawing a flat outline and painting something that actually looks three-dimensional
Sketch The Head. Draw The Outline Your Painting Will Follow (No Drawing Experience Needed)

Set your paint and brush aside, this module is pencil only. You'll draw a simple outline of the head straight onto your canvas: the right shape, size, and angle, nothing else. By the end, you'll have a light pencil outline with no face and no paint yet.
- A simple 3-line method for getting any head shape right on the first try
- How to angle and tilt the head to match your reference photo exactly
- Learn how much space to leave around the head so there's room for the background later
- A 30-second checkpoint to catch a lopsided outline before you go any further
- Why this step is done in pencil, not paint, and what that saves you later
Sketch The Face. Add Eyes, Nose, Mouth, Ears, And Hair To Your Outline (No Drawing Experience Needed)

Still pencil, no paint yet. You'll draw every feature onto the outline from Module 2, so the sketch already looks like the person in your photo before a single brushstroke happens. By the end, your full pencil sketch will be done and ready to paint.
- A simple grid method for placing eyes, nose, and mouth in the right spot the first time
- How to sketch ears and a hairline that frame the face naturally
- Learn to rough in the shape and flow of the hair before any fine detail
- How to fix a likeness while it's still pencil, the easiest place to catch a mistake
- A finished-sketch checklist that tells you when you're ready to pick up paint
Pick Up Your Brush. Paint Over Your Sketch For The First Time

This is where paint comes back. You'll trace over your pencil sketch with a thin, watered-down layer of paint, blocking in the basic shapes of the face and the first hint of color. Nothing needs to look finished yet, you're just covering the canvas for the first time.
- How to thin your paint so it goes on light and doesn't hide your pencil sketch underneath
- Learn to block in skin tone, hair color, and background in simple flat shapes
- Discover why painting too dark or too detailed at this stage causes problems later
- A simple order to follow: background first, then face, then hair
- How to tell you've done enough for this module, and when to stop
Paint Your Hair And Clothing While The Face Stays A Simple Wash
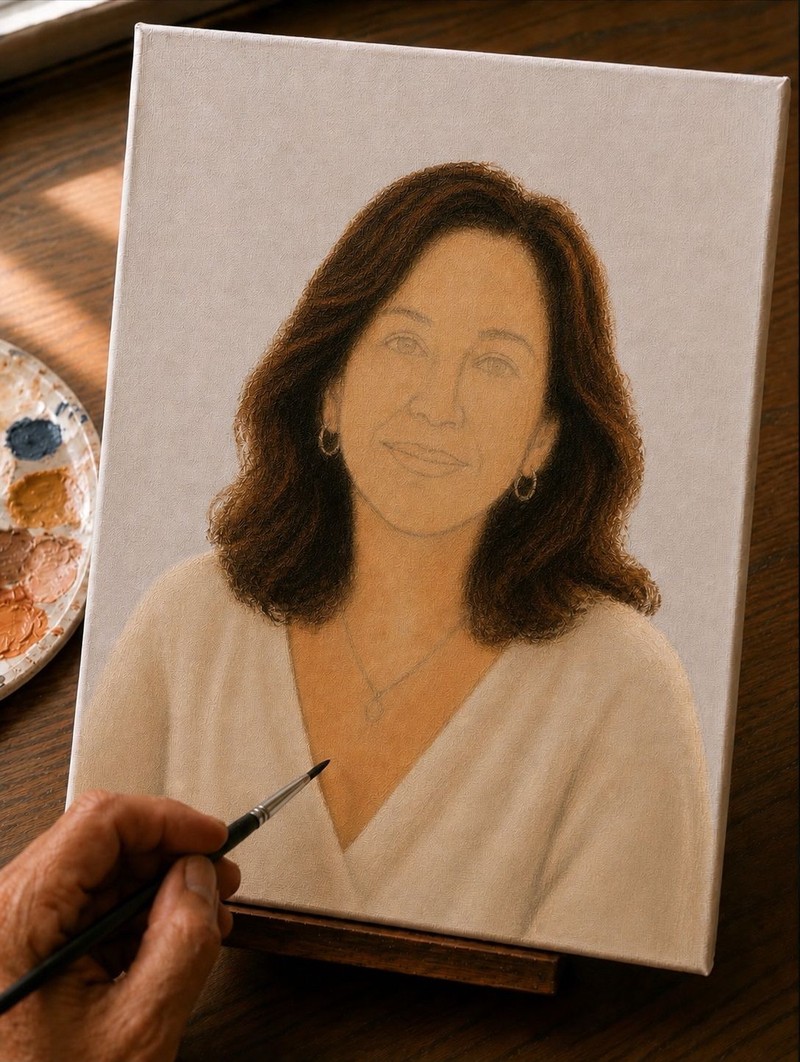
Before you touch the face, you'll fully color in the hair and clothing. This module keeps things simple: block in believable hair color and clean fabric tones across large areas, while your face stays a light, transparent wash with the pencil sketch still showing through underneath.
- How to choose the right hue and value for natural-looking hair before adding any strand detail
- A simple layering technique for filling in fabric with clean, even color, no streaks or patchy spots
- Why you'll color hair and clothing before the face, and how it sets you up for an easier next module
- How to keep your color consistent across large areas so nothing looks blotchy or uneven
- A coverage checkpoint that tells you when your hair and fabric are ready, so you know exactly when to move on
Add Facial Features. Paint Skin And A Lifelike Expression
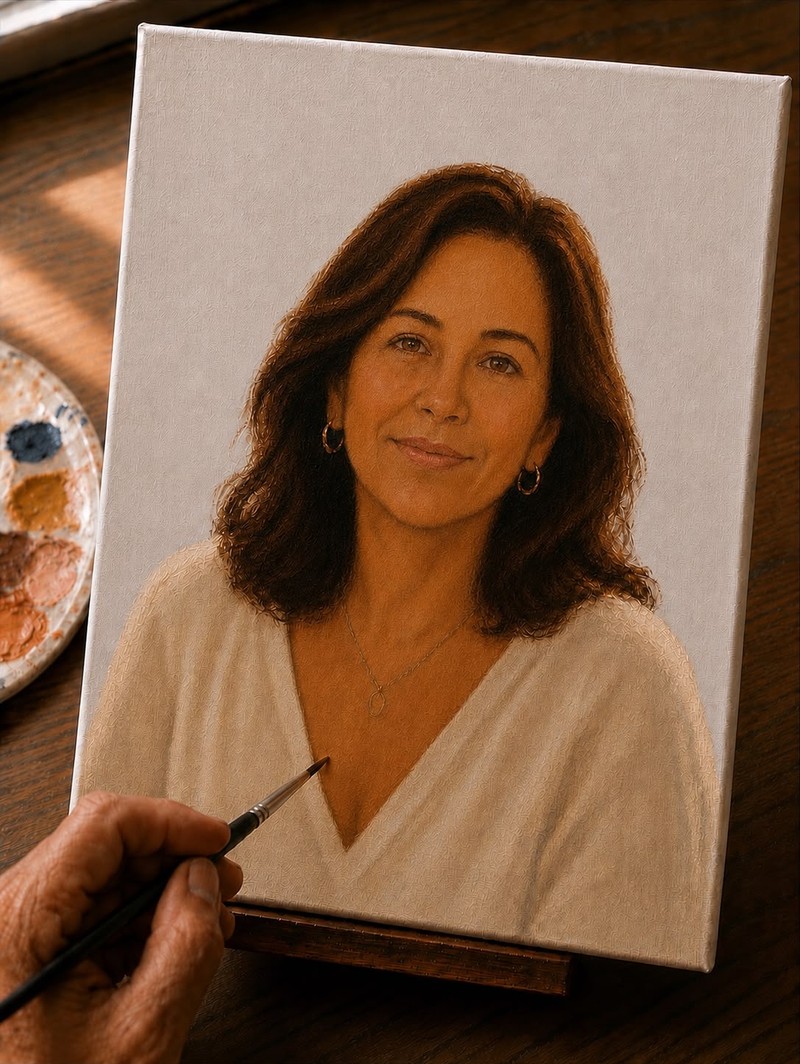
With your hair and clothing already colored, you'll bring the same focus to the face: building up the layers of paint that make skin look real and expressions look alive.
- A simple blending technique for skin that looks warm, not flat or waxy
- How to build up facial features with layered color until they read as a true likeness
- The trick for shaping the face with light and shadow so it looks three-dimensional
- How to paint eyes with a bright catchlight so they look alive on the canvas
- A halfway checkpoint so you know your detail level is on track
Begin The Glow. Lay In The First Wash Of Color And Light Behind Your Subject
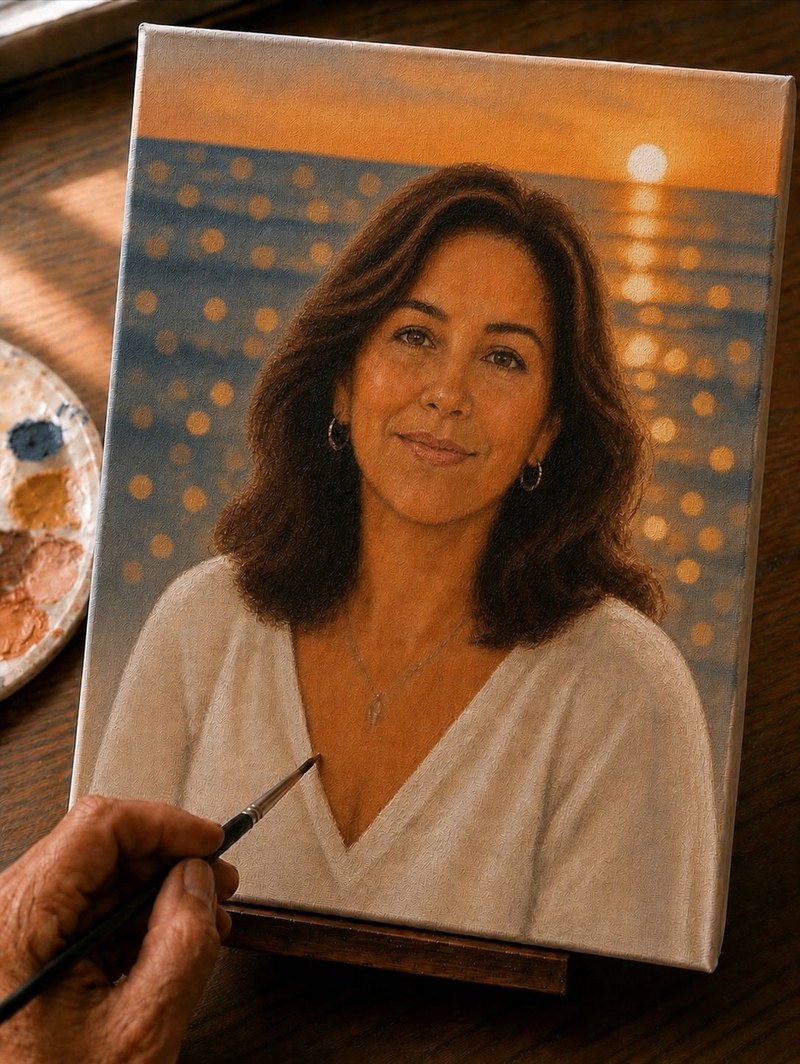
With your portrait fully painted, it's time to start bringing the background to life. You'll lay in the first loose wash of warm color behind your subject and rough in the earliest shapes of the glowing light, setting the stage for the full bokeh effect you'll finish in the next module.
- How to lay in a loose, uneven wash of background color without covering your finished portrait
- The rough dabbing technique for placing your first bokeh shapes, imperfect on purpose at this stage
- How to keep your background loose now so it blends and builds beautifully later
- Why starting rough gives you a better final glow than trying to get it perfect in one pass
- A checkpoint for spacing your first light shapes before you move into the final module
Paint The Bokeh Glow. Finish With The Dreamy, Glowing Background
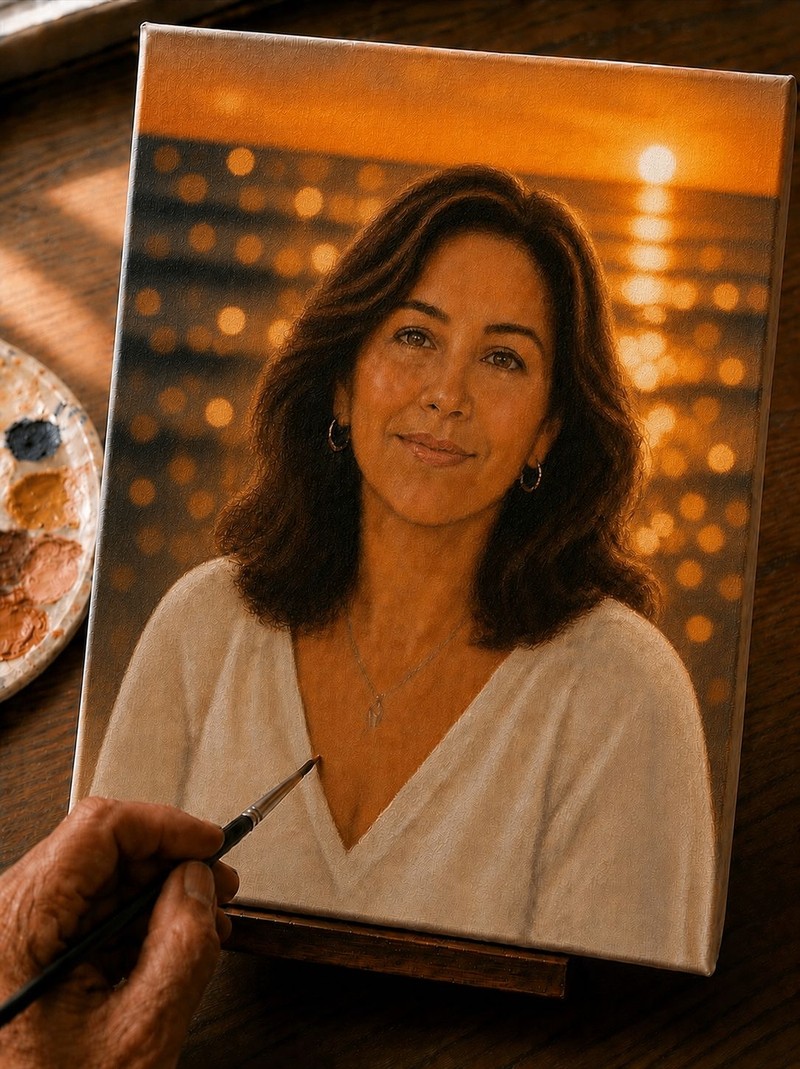
This is the signature technique, and the reason this course exists. You'll paint the soft, glowing circles of light behind your subject, the effect that turns a good portrait into an unforgettable one, and then add the final touches that make the whole canvas feel warm and alive.
- The dabbing method for soft, glowing circles of light: no hard edges, no flat dots
- How to choose warm or cool tones that match the mood of your reference photo
- Learn to vary the size and spacing of your circles so the glow looks natural, not repeated
- A final layering pass that makes the whole portrait feel richer before you call it done
- You'll finish your first complete portrait, glowing exactly the way you pictured it
Why you'll be paying less for this course
Here's the honest version. The full price of The Dreamy Portrait Academy is $97, and that's what it'll sell for once it's fully rolled out.
But right now, this is a beta launch. I'm keeping enrollment small on purpose, because I want real students working through these modules and telling me exactly where they get stuck.
If it works the way I think it will, the price goes up and stays up. If something isn't landing, this page comes down and gets rebuilt.
Either way, this price is temporary. So for now, while spots are open: $47.
Access Now
Plus You'll Be Backed By My Unconditional Money Back Guarantee
You don't have to decide right now. Get access and try it for 30 full days. Work through the modules, paint your first portrait, see how it feels.
If it's not for you, send one email to hello@lumenandlinestudio.com and you'll get every penny back within 24 hours. No questions asked. No stalling.
"You either love what you create... or you don't pay for it."
Get 3 free bonuses if you join now
I want to make sure you actually start and keep going, so I've included a few extra resources to remove every excuse to stall out.
Bonus #1: The Exact Acrylic Paint & Canvas Kit List

No more standing in the art aisle wondering what to buy. This is the exact kit list, budget and premium versions, with links.
- The 8 colors you actually need (not the full 24-tube set)
- A budget option under $25 and a premium option if you want to upgrade
- What canvas size and texture actually holds detail well for portraits
- The four brushes worth owning, and what each one is for
Bonus #2: The Bokeh Light Placement Cheat Sheet

A reusable reference for placing glowing light behind any portrait, whether your background is a garden, a city at night, or a sunset.
- Six ready-to-copy bokeh layout patterns
- How to mix warm versus cool tones for the mood you want
- A quick-reference guide for circle size and spacing
- Discover how to keep backgrounds from competing with the face
Bonus #3: Common Mistakes & Quick Fixes

The troubleshooting guide for the exact moments students get stuck, so a rough patch never turns into a half-finished canvas in the closet.
- Why your skin tones look muddy, and the two-step fix
- How to rescue a face where the proportions have drifted off
- What to do when your bokeh background looks flat instead of glowing
- The most common beginner mistake in Module 8, caught before it happens
Here's everything you're getting so far:

✅ The Dreamy Portrait Academy — $97
But now you get everything for just $47
Access Now
Got more questions? I got you:
Need help? hello@lumenandlinestudio.com
Do I need any prior painting experience? +
When and where does the course take place? +
How much time does this take? +
What materials do I need? +
When will I get access? +
Having trouble with course access? You can email hello@lumenandlinestudio.com for support.
How long do I have access? +
What if I try it and it's not for me? +
Is this a one-time payment or a subscription? +
Is it safe to pay online? +
What if my painting doesn't look exactly like the reference photo? +
To recap, here's everything you will get for just $47:
✅ The Dreamy Portrait Academy — $97
But now you get everything for just $47
Access Now